Guide to set up Headless mode
Headless Mode means system runs without any primary input and output such as keyboard or monitor. The system won't use any desktop environment and therefore GUI applications cannot run. The headless mode is set from the installation step, and all settings are configured via files or terminals. Raspberry Pi OS has a lite version which is actually a headless OS.
Last update: 2022-06-04
Table of Content
Download OS Image#
Official images for recommended operating systems are available to download from the Raspberry Pi website download page. Headless Mode is usually used on the Raspberry Pi OS Lite version in which the graphical UI is not installed.
The release notes of OS are listed in each build version in here.
64-bit OS
From 2022 Feb, Raspberry Pi starts supporting 64-bit OS on Model 3, 4, 400, and Zero 2W.
Note that some third-party packages may not work on 64-bit OS.
Burn Image to an SD Card#
OS usually comes in one image file which needs to be written (burned) to SD Card. The content of the image is extracted to the target SD Card, while still preserves partition table and some special attributes such as bootable flag.
Raspberry Pi Imager#
Raspberry Pi Imager is the official Image Writer from Raspberry Pi.
Run the Raspberry Pi Imager, and select the Desktop version but without recommended software.
Press Ctrl + Shift + X to show the advanced menu, fill some settings as below:
- Hostname:
raspberrypior what you want - SSH: check the box and set a password
- WiFi (optional): if you want to use WiFi as the primary network, fill SSID and password

BalenaEtcher#
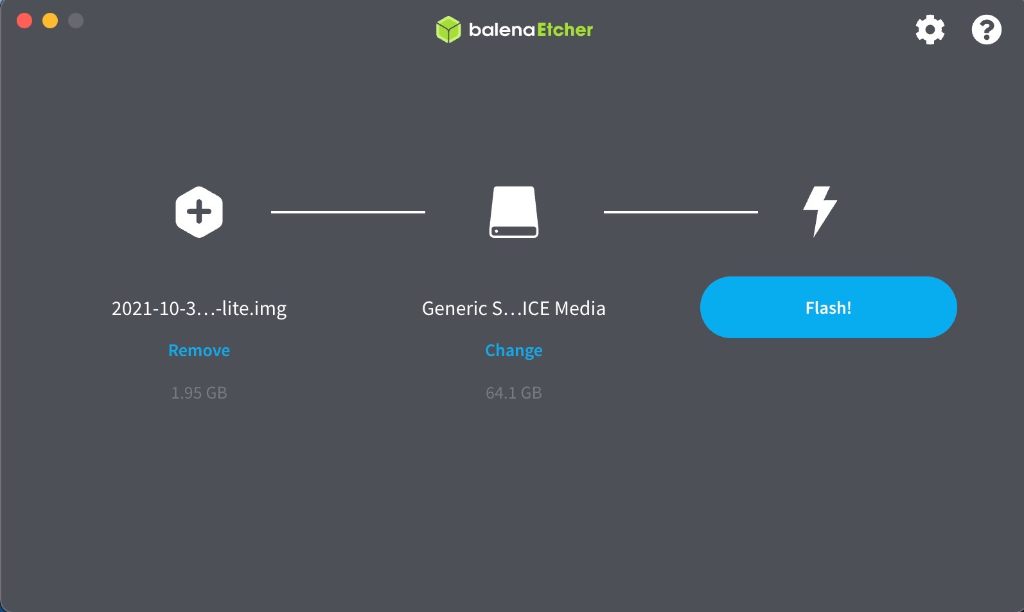
The application BalenaEtcher is a very good image writer that will write the OS image to an SD Card. Download and install it, then run it. Just follow the guided steps:
- Select image — browse to the zip file downloaded above
- Select drive — it may find the SD Card drive automatically
- Click Flash
After copying the image to the target SD Card, File Explorer may have trouble seeing the content of that SD Card. A simple fix is to pull the SD Card out then plug it back. It should appear with a partition named boot.
Enable SSH
For security reasons, Secure Socket Shell (ssh) is no longer enabled by default. To enable it, place a blank text file called ssh no file extension in the root of the boot partition on the SD Card.
Add Wi-Fi Network
To add a wireless network which Pi will automatically connect to, create a text file called wpa_supplicant.conf and place that file in the root of the boot partition on SD Card too.
In below config file, the ssid field is the Wi-Fi Access Point name, and the psk field is the password of that Wi-Fi.
country=US
ctrl_interface=DIR=/var/run/wpa_supplicant GROUP=netdev
update_config=1

network={
    ssid="NETWORK-NAME"
    psk="NETWORK-PASSWORD"
}
See ISO 3166-1 country codes to fill into country field.
If the target network is a hidden one, an extra option in the wpa_supplicant.conf file, scan_ssid=1, may help connection.
Adding multiple wireless network configurations is allowed, with some extra fields to set the name and the priority (higher number gets connected first):
network={
    ssid="HomeOneSSID"
    psk="passwordOne"
    priority=1
    id_str="homeOne"
}

network={
    ssid="HomeTwoSSID"
    psk="passwordTwo"
    priority=2
    id_str="homeTwo"
}
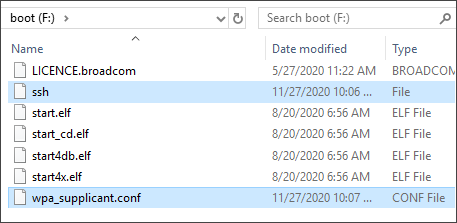
ssh and wpa_supplicant.conf in the boot partition
For Pi Zero / Zero W, see the Direct USB connection section to skip setting a Wi-Fi network, as it will setup a virtual network over the USB connection.
Direct USB connection#
Apply to Pi Zero / Zero W Only
On Pi Zero / Zero W only, it’s able to turn on USB OTG mode and the Pi will act as a USB slave with different modes: Serial, Ethernet, Mass storage device, etc. The research was published here and here.
This step will set up Pi in USB OTG Ethernet mode, so that when plugging Pi into computer by the Peripheral USB port, labelled __USB__, not PWR, there is virtual network will be created and Pi can be accessed over that network, and no need of an external Wi-Fi network is required. This method also helps to power Pi over the USB port.
-
Add
dtoverlay=dwc2on a new line in theconfig.txtfile. -
Open up the
cmdline.txtfile. Insertmodules-load=dwc2,g_etherafterrootwaitwith only one space between the textrootwaitand the new text!!!
Login to Pi#
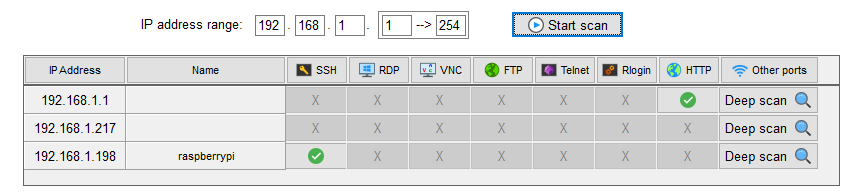
Power Pi up and wait for the power led gets stable. Use any Network Scanner to detect the IP of the Pi. A plugin on MobaXterm can be used too.
For the official Raspberry Pi OS, the default username is pi, with password raspberry, on the host raspberrypi.local. If you change the hostname in Raspberry Pi Imager, make sure to use that new hostname, e.g. mypi.local.
Bonjour is a service from Apple to discovery devices in a network using hostname. Install it and then Pi can be connected using its default hostname raspberrypi.local.
Review Network Settings
This command should list the network connection in the first line for wlan0:
iwconfig
This command should show info for wlan0:
ifconfig
This command should list the wlan0 network with details:
iwlist wlan0 scan
Connect to another Wi-Fi network
Open the wpa-supplicant configuration file in nano editor:
sudo nano /etc/wpa_supplicant/wpa_supplicant.conf
Go to the bottom of the file and add the following:
network={
    ssid="NETWORK-NAME"
    psk="NETWORK-PASSWORD"
}
Reconfigure the interface with:
wpa_cli -i wlan0 reconfigure
Verify whether it has successfully connected using ifconfig wlan0
Update system (optional)#
To get the latest version of Pi OS and its packages, please update the system by entering below commands:
sudo apt update && \
sudo apt upgrade -y
Expand File system (optional)#
To use all of available space on the SD Card, expand the file system by running:
sudo raspi-config
Select Advanced Options → Expand File system
Then reboot the system.
Serial Console#
By default, the primary UART is assigned to the Linux console, and the secondary UART is connected to Bluetooth Module (on model having Bluetooth feature — Pi Zero W, Pi 3, and Pi 4).
Use raspi-config to disable the Linux serial console, then enable UART as a peripheral.
Remote access over VNC#
If you want to access the GUI, complete with a desktop and floating windows, you’ll need to enable VNC. Note that the Lite OS does not have GUI installed by default, you have to install a Desktop Environment Manager first.
Enable VNC#
To enable VNC server, it must be turned on though raspi-config.
Firstly, run:
sudo raspi-config
then select Interfacing Options, choose VNC, and select Yes.
Access over VNC#
-
On the remote PC, install and launch VNC Viewer
-
Create a New Connection, and enter
raspberry.local(or whatever you changed in the setup step) in the VNC Server field.If this does not work, try again with the name raspberrypi without .local
-
After adding new connection, run that session and fill in username and password to login